


The essential pairing in a 400mm cloakroom vanity unit with basin is a compact cabinet and a basin sized to sit above it. Taps, waste fittings, handles and wall fixings can vary, so the product details matter as much as the overall width. Choosing a well-proportioned finish helps a small cloakroom feel considered without losing sight of everyday practicality.
It’s easy to assume that “with basin” means every fitting is included, but the exact contents depend on the unit. This guide explains what to look for in the package, how basin and cabinet finishes work together, and which details can affect fitting and long-term care. You’ll also find practical pointers on measuring the space, choosing between floorstanding and wall-mounted designs, and considering moisture resistance, so you can compare options with greater confidence.
Key Takeaways
- Compare basin and cabinet finishes, then choose a handle that complements the look without overwhelming a compact room.
- Measure the available space and consider floorstanding or wall-mounted designs before planning the installation.
- Look beyond appearance: surface finish, moisture exposure and everyday care all influence how well the unit suits your cloakroom.
- Check the package contents carefully so you can distinguish the basin and cabinet from taps, waste fittings and other extras.
Choice of unit and basin finishes and handles
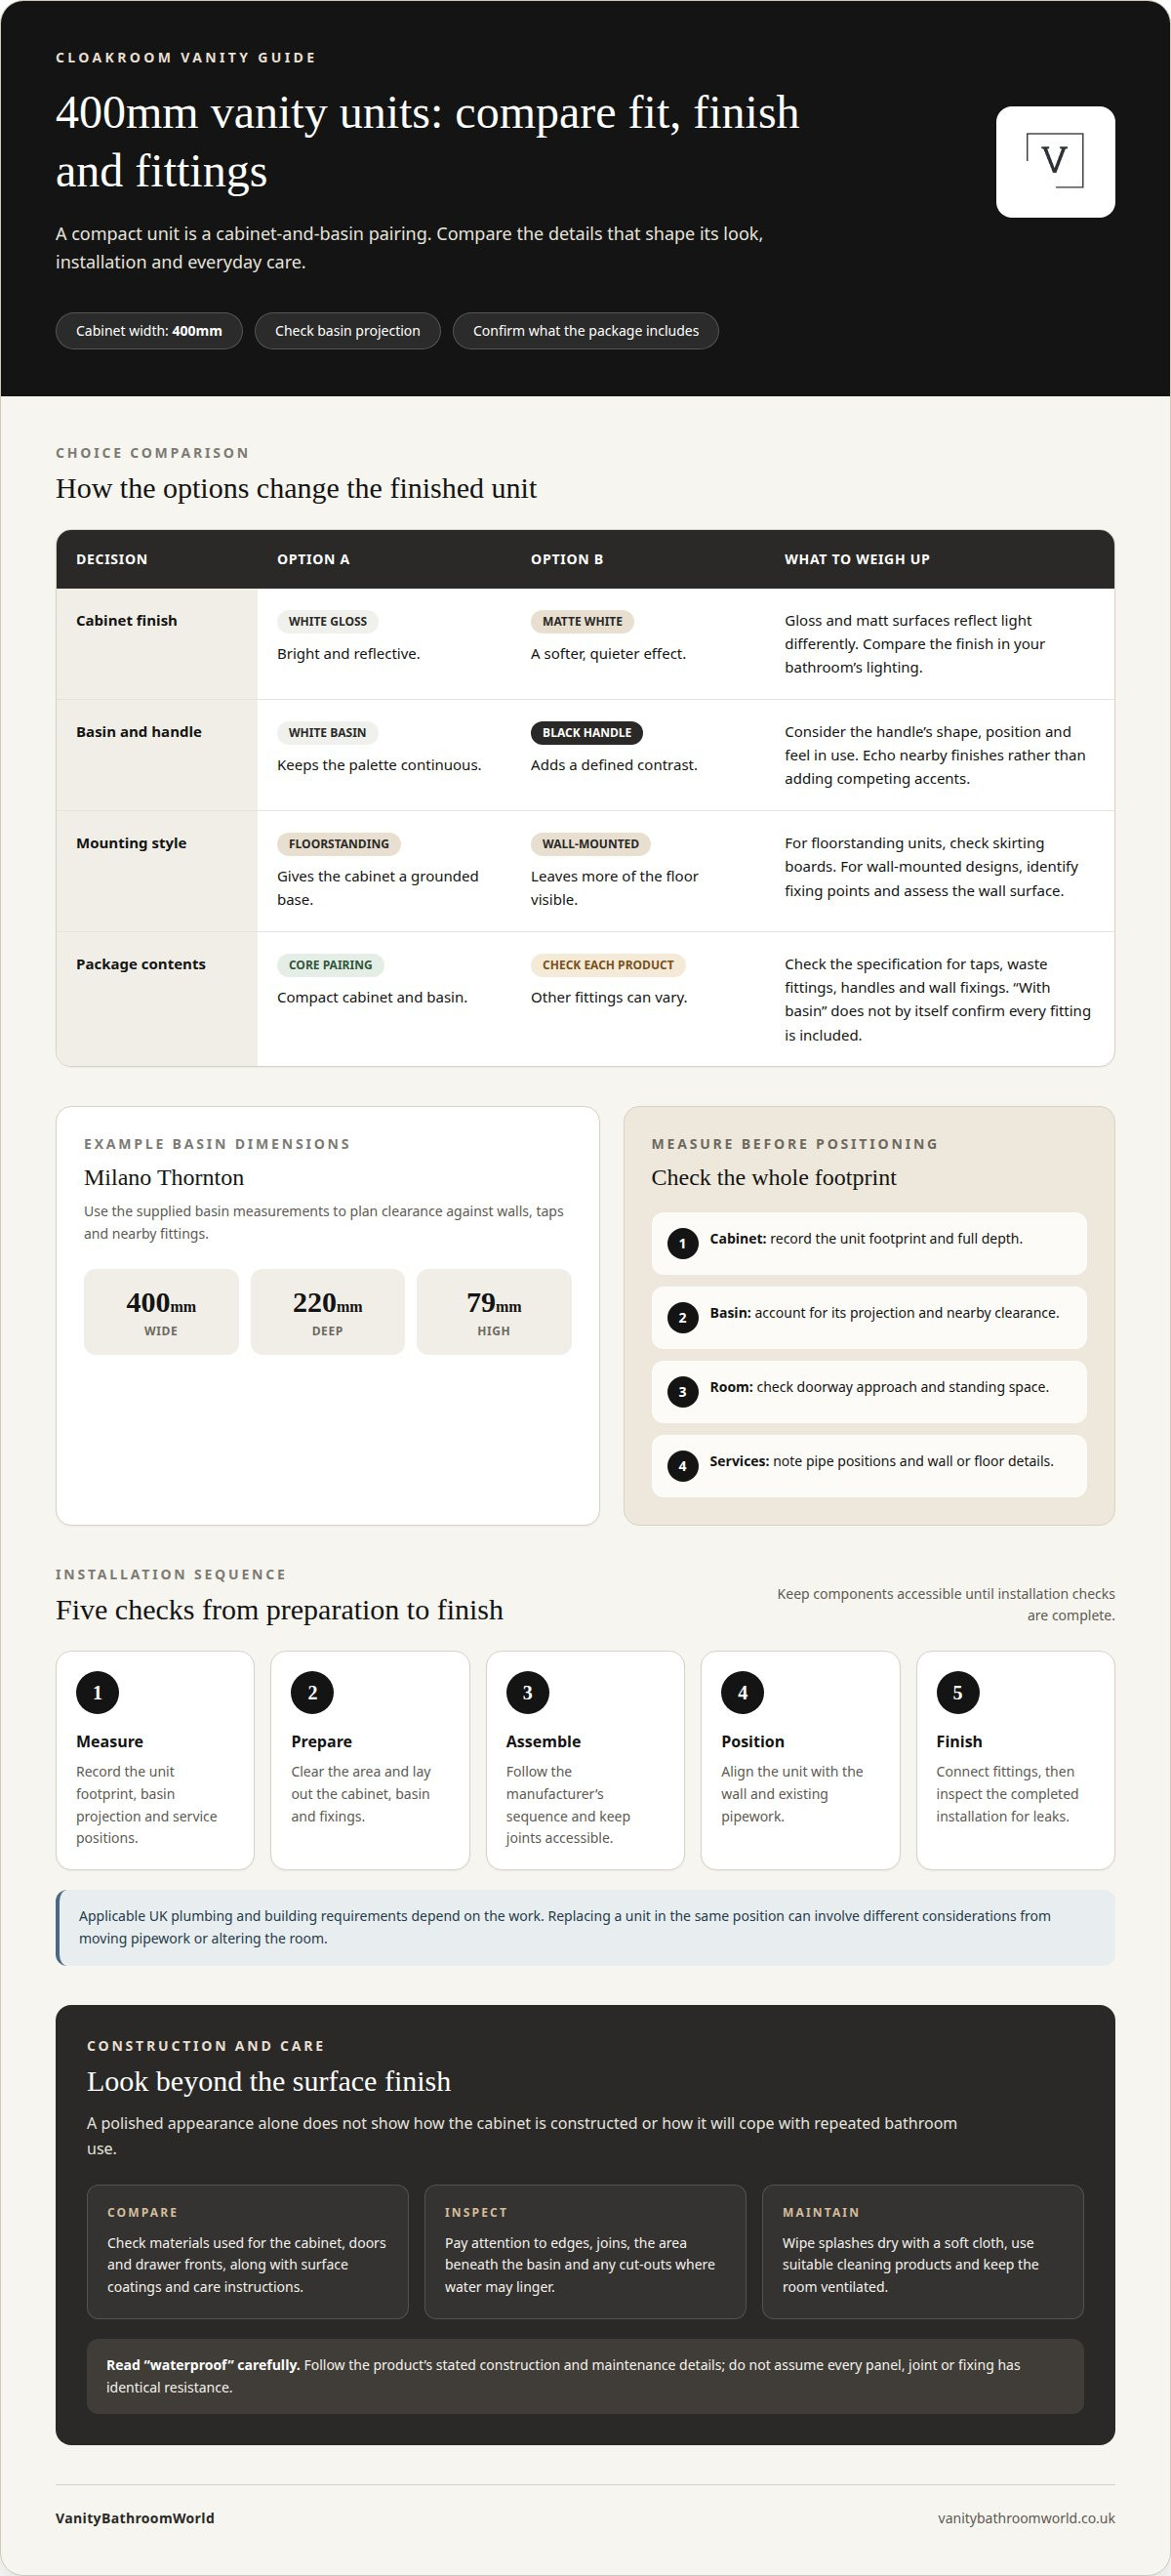
Match the cabinet, basin and handle as one considered composition. First, decide whether the unit should recede or create contrast. White gloss gives a bright, reflective finish; matte white creates a softer, quieter effect. A white basin keeps the palette continuous, whilst a black handle adds a defined accent. Compare the finish in your bathroom’s lighting, since gloss and matt surfaces reflect light differently. The 400mm width makes the balance between cabinet colour and basin especially noticeable in a compact cloakroom.
Choose the cabinet finish to suit the room’s existing details. For example, echo the basin’s white surface with pale walls, or repeat a dark handle in nearby fittings. Keep the palette considered rather than introducing several competing accents. Gloss white is one available finish across compact unit examples, while black handles provide a sharper contrast. A handle is also a practical touchpoint: consider how its shape and position feel to use, not only how it looks against the cabinet front.
Compare basin shape and cabinet form together. A compact basin can preserve a neat outline, while its depth and projection affect how it sits within the room. Floorstanding and wall-mounted designs create different visual effects: a floorstanding cabinet gives the composition a grounded base, while a wall-hung design leaves more of the floor visible. Before choosing, picture the basin and handle against the cabinet front, then consider how the unit will relate to nearby taps, wall finishes and other visible fittings.
For UK buyers, standard delivery to eligible UK destinations takes 2-5 working days. Return arrangements and warranty cover depend on the retailer’s terms and the product, so review both before purchase. Then compare the complete specification, rather than relying on finish photographs alone. Check the stated width, basin dimensions, handle style and mounting type against your room plan. A glossy white cabinet with a black handle, for instance, creates a different effect from a seamless white-on-white combination, even when both suit a compact cloakroom.
Assembly and installation
Start by measuring the floor, wall and pipe positions before moving the unit. A 400mm cabinet needs room for its full depth, basin projection and door movement. Measure skirting boards too, since they can affect how a floorstanding unit sits. For a wall-mounted design, identify the fixing points and assess the wall surface. These details help establish whether the chosen position works with existing services.
Next, compare the basin’s dimensions with the cabinet and available clearance. The white basin supplied with the Milano Thornton measures 400mm wide, 220mm deep and 79mm high. Use those measurements to plan its position against taps, walls and nearby fittings. Follow the product’s assembly sequence, align the basin securely, then connect the water and waste fittings. Keep the components accessible until the installation checks are complete.
Cloakroom basin installations in the UK must meet applicable plumbing and building requirements. Which requirements apply depends on the work, including water connections, drainage and any changes to the property. Replacing a unit in the same position can involve different considerations from moving pipework or altering the room. Plan the installation around the existing layout and the extent of the changes.
- Measure: record the unit footprint, basin projection and service positions.
- Prepare: clear the area and lay out the cabinet, basin and fixings.
- Assemble: follow the manufacturer’s sequence and keep joints accessible.
- Position: align the unit with the wall and existing pipework.
- Finish: connect fittings, then inspect the completed installation for leaks.
For example, a 400mm-wide basin may fit the cabinet width but still project into a doorway. Check the room’s approach and standing space before fixing the unit in place. If you’re comparing basin shapes for a compact layout, browse cloakroom basin options alongside your measurements. A clear plan makes assembly more orderly and helps the finished unit sit neatly within the room.
Construction materials and moisture resistance
A cabinet’s surface finish is only one part of its construction. Check the product description for the material used in the cabinet, doors and drawer fronts. These components may use different materials, even when they share a gloss white finish. Look for clear details about surface coatings and exposed edges, then compare them across shortlisted units. A polished appearance alone doesn’t establish how a cabinet will cope with repeated bathroom use.
Moisture can reach a vanity unit through splashes, damp hands and condensation. Pay particular attention to edges, joins and areas around the basin, where water may linger. For example, a small splash left along a cabinet edge can be more relevant than water on the centre of a smooth door. Wipe surfaces dry after splashes, and keep the room ventilated to limit lingering damp. Follow the care guidance supplied with the unit.
The word “waterproof” needs careful interpretation. A product described that way may still have specific care instructions, so read its stated construction and maintenance details. Don’t assume every panel, joint or fixing has identical resistance. Check the area beneath the basin and around any cut-outs, as these locations can be exposed during daily use. A continuous-looking white gloss finish, for instance, doesn’t reveal the material beneath it.
- Compare: note the cabinet material, finish and care instructions for each option.
- Inspect: look for details about edges, joins and basin contact areas.
- Maintain: remove standing water with a soft cloth and use suitable cleaning products.
For a 400mm unit, compact proportions don’t remove the need for careful placement. Keep the cabinet away from persistent splashes where the room layout allows, and avoid trapping damp items against its panels. Check the finish periodically for lifting edges or damage, especially near the basin. Prompt cleaning and following the manufacturer’s care guidance help preserve the surface and keep the unit looking composed.
Included items and additional fittings
A listing that says “with basin” identifies the main pairing, but package contents can vary. Read the included-items list to distinguish the cabinet and basin from taps and other fittings. Product photographs may show accessories that are not supplied. Use the written specification to see what is included and which separate items you may need for installation.
Check the basin’s tap-hole arrangement before choosing a tap. A basin with a tap hole needs a compatible tap, while a hole-free design may suit a wall-mounted tap. Match the tap’s reach and height to the basin so water flows into the bowl, not onto its edge. For example, a short spout may not reach comfortably over a deeper basin.
Choose a waste that suits the basin’s design. First, check whether the basin has an overflow. A basin with an overflow needs a compatible slotted waste, while one without an overflow requires an unslotted type. The waste must also fit the basin outlet and connect to the existing plumbing. These details matter more than appearance alone.
- Cabinet: check whether handles, shelves and wall fixings are included.
- Basin: look for the tap-hole and overflow details.
- Tap: match its mounting style and spout reach to the basin.
- Waste: choose slotted or unslotted to match the overflow design.
- Sealant: establish whether this finishing material is supplied separately.
Before ordering, compare these details with your planned fittings and existing pipe positions. For example, replacing a basin while keeping the current tap may require matching its mounting arrangement and reach. If you’re still choosing the bowl, browse basin options and compare each design’s tap-hole and overflow details. A concise checklist helps separate the core unit from the extra fittings needed for a complete, coordinated installation.
VanityBathroomWorld: Vanity Units
VanityBathroomWorld offers vanity units, bathroom furniture, LED mirrors and basins for considered bathroom schemes. If you’ve settled on the dimensions and fittings for your cloakroom, explore its vanity units to compare options for the space. A basin can complete the practical pairing, while bathroom furniture and an LED mirror can help create a more cohesive setting. Focus on the details that matter in your room, including the unit’s proportions, finish and storage arrangement. This makes it easier to choose pieces that work together without losing sight of the cloakroom’s everyday needs. Explore VanityBathroomWorld’s range when you’re ready to consider suitable bathroom furnishings for your home. Visit vanitybathroomworld.co.uk to browse the range.
Bring your cloakroom vision together
A carefully chosen 400mm cloakroom vanity unit with basin can give a compact room a more considered centrepiece. Before deciding, picture how you want the space to feel each day, from the first impression at the door to the ease of using it. A consistent design direction can make even practical choices feel intentional, whether you favour a crisp, contemporary look or a softer, more understated palette.
VanityBathroomWorld sells vanity units, bathroom furniture and LED mirrors to help you bring complementary pieces into your bathroom scheme. Let your preferred look guide your choices, then compare products that suit your home and the atmosphere you want to create. A coordinated cloakroom begins with pieces that work for your space, not simply the smallest available footprint.
Contact VanityBathroomWorld to explore your options, and take the next step towards a cloakroom that feels thoughtfully yours.
Frequently Asked Questions
What’s included?
VanityBathroomWorld’s floorstanding vanity units include an integrated ceramic basin, built-in storage, soft-closing hinges and a matching pop-up waste. The storage holds toiletries and other bathroom essentials, while the basin completes the unit. Check the product listing for its available colour and width, as options vary. Some assembly is required, and step-by-step instructions are provided.
What is a 400mm cloakroom vanity unit with basin?
It’s a vanity unit designed around a 400mm-wide cabinet, paired with a basin to create a compact washing area. The cabinet supports the basin and provides enclosed storage, making the arrangement useful where a separate basin and storage piece would take up more room. Measure the available wall width and consider the unit’s listed depth, so it suits the room’s layout.
Which materials and finishes are available, and how durable are they?
VanityBathroomWorld vanity units have integrated ceramic basins that are easy to clean, and a strong, stable construction. Colour options include white, blue, red, grey and green, with options varying by product. For routine care, use a soft cloth and mild cleaner suited to the material, and dust regularly to maintain the finish. Not every colour is available across every unit.
Do 400mm vanity units include a tap, waste and plumbing fittings?
VanityBathroomWorld units include a matching pop-up waste, but taps, chrome wastes and bottle traps are purchased separately. Before choosing a tap, check the basin’s tap-hole arrangement and compare the tap’s reach with the bowl. Match the waste to the basin design, then consider how it connects to the existing plumbing. This helps you identify the additional fittings needed for installation.
How do I measure and install a 400mm cloakroom vanity unit?
Measure the wall space, floor area and pipe positions, then compare them with the product dimensions. Allow for the basin’s projection and space for any doors or drawers to open. VanityBathroomWorld units require some assembly, with clear step-by-step instructions provided. Plan the position before assembling so the cabinet aligns with the existing services. The plumbing connections should suit the basin and waste arrangement.
Which UK retailers sell 400mm cloakroom vanity units with basins?
VanityBathroomWorld offers vanity units, including 400mm cloakroom options.